
Last modified on Sep 15th, 2026
To back up your Act! database manually, use the built-in backup utility found in the desktop application.
- Sign in to your Act! as an Administrator or Manager.
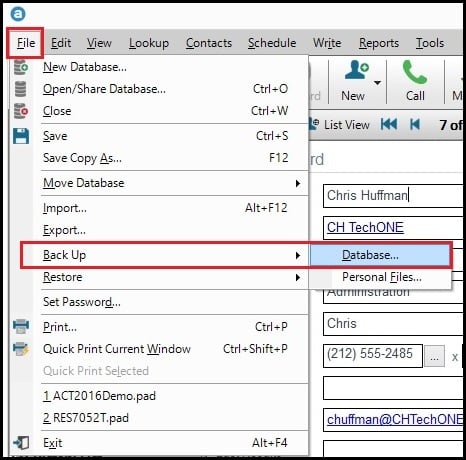
- Go to “File”, press “Back Up” and choose “Database.”
- Click “Browse” to find a location you want to save the records.
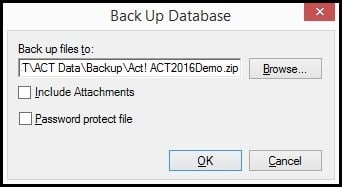
- Provide a name (such as adding the current date), then click “Save.
- Decide whether you want to include attachments by either setting Include Attachments Checkbox to checked or not checked.
- Press “OK” to start backing up the next items into a .ZIP file:
- The Database
- Attached Documents (if included in step 5)
- Layouts
- Document Templates
- Report Templates
- Saved Queries.
7. When you see the confirmation window, press “OK” to complete the backup process.
Still Need Help?
Please submit an inquiry on the contact page or email support@syncmatters.com.