Last Updated: April 11th, 2025
There are many potential reasons why you might want to filter your data during migration:
-
Get rid of outdated records—like data that hasn't been modified in over 10 years.
-
Tiny image files (such as Facebook or LinkedIn icons from email signatures) can unnecessarily inflate your file count and increase the cost of your migration.
-
You might want to migrate only specific data—for example, information relevant to a particular team—to a new CRM.
-
Sometimes, you need to split a single source object (like Activity) into multiple target entities, such as Calls, Meetings, and Tasks.
Filters are incredibly useful in these cases. You can apply them during the second step of the migration wizard Select Object. Click on a funnel icon in the row of an object where you'd like to set a filter:

A saved filter is highlighted in orange.
To add a filter: Once you click on Add Filter, you will see this pop-up window. Click on the button "Add filter":
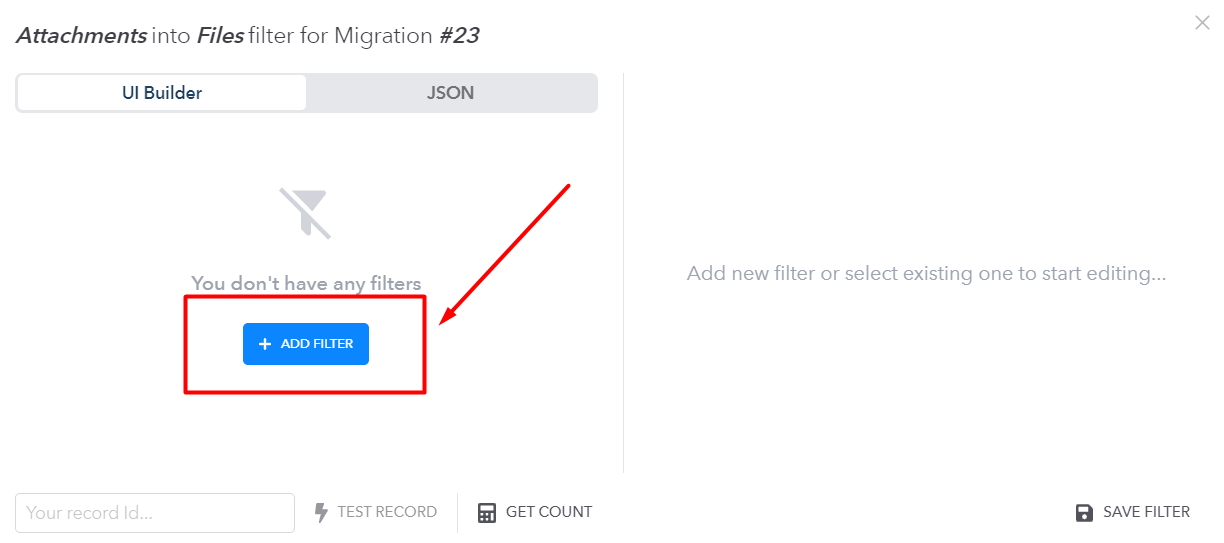
Then click on the Select Property field and choose the value from the list of options: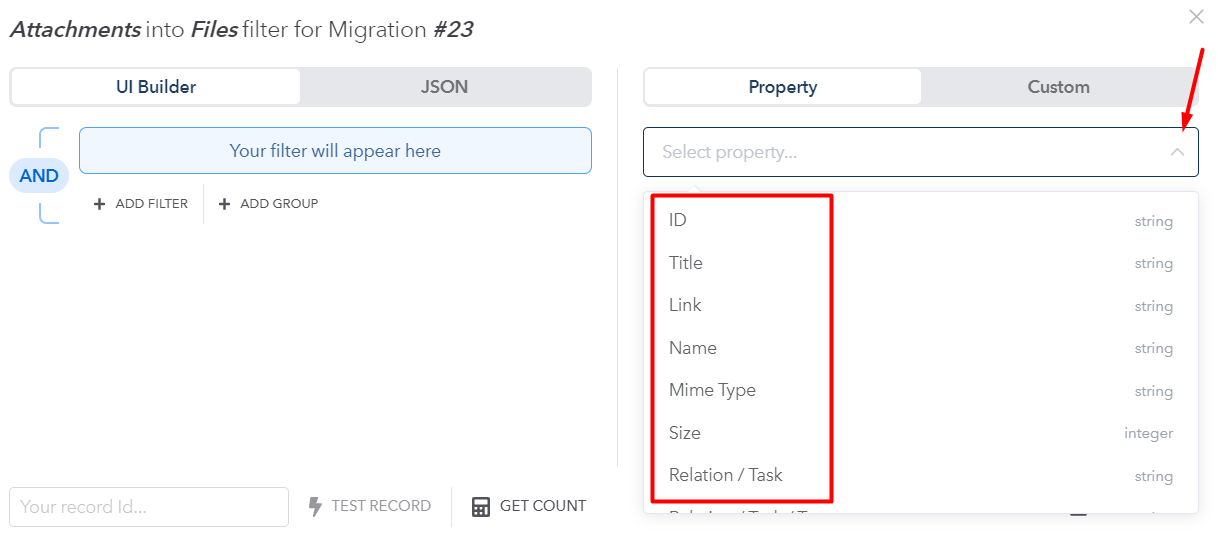
For example, if you select the ID field, you will need to select the rule, for example:
Equal to: Match records that have a property with a specified value;
Not Equal: Match records that do not have a property with a specified value;
Or any other available option from the list: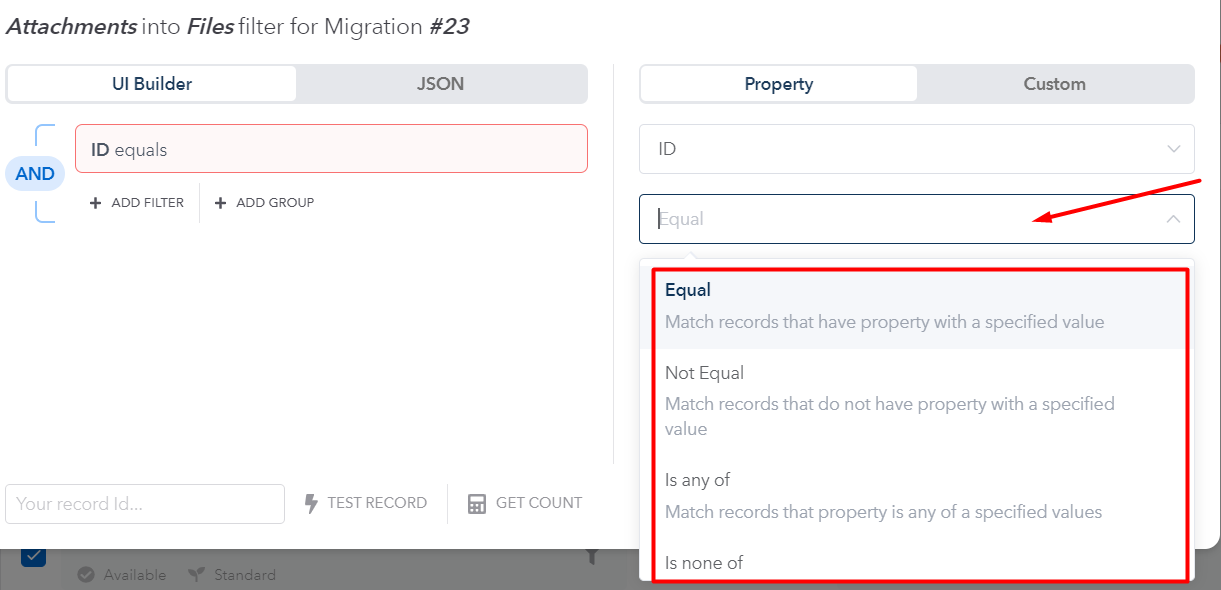
Type in the value (single option or several values, separated with a comma).
These values will automatically show in the filter settings on the upper left side: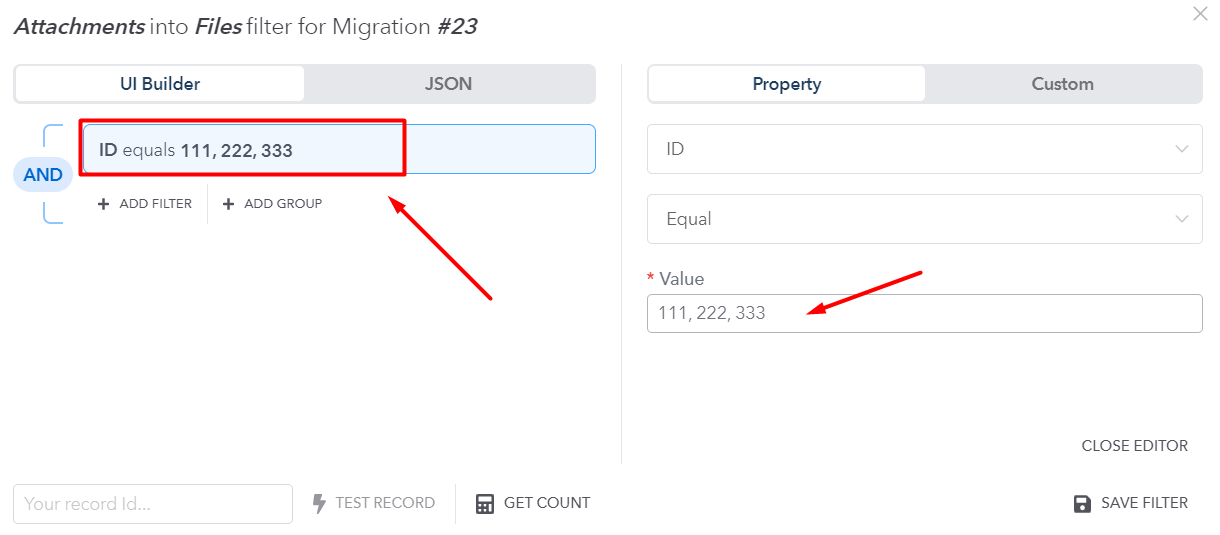
You can also add another filter or group (buttons: Add Filter, Add Group") and do the same actions mentioned above: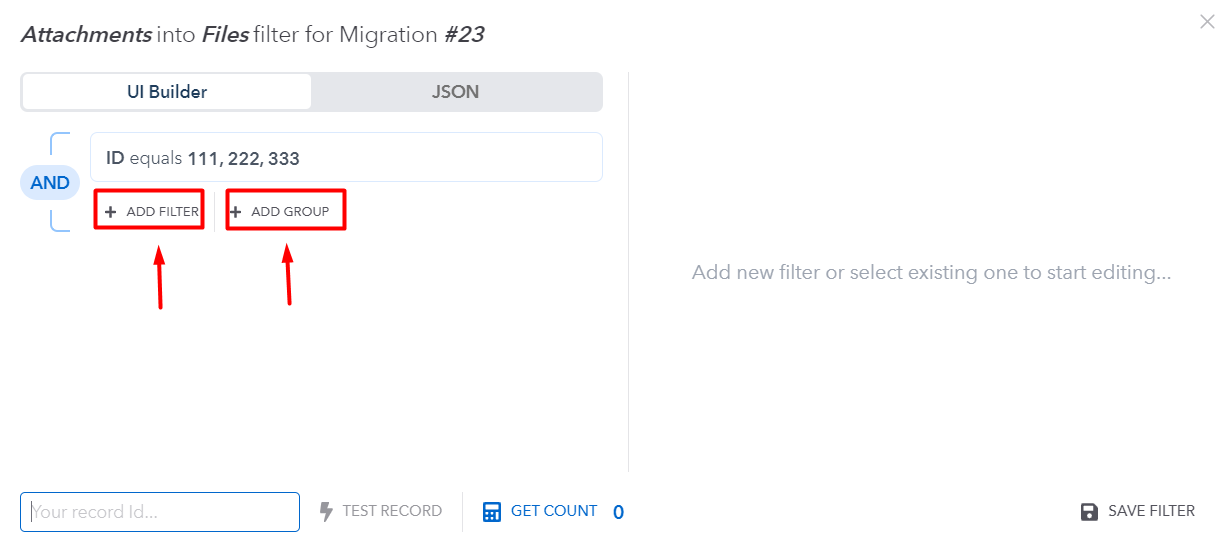
You can also use the options below: Test Records (you will be asked to input an ID of a test record) and "Get Count" to check how many records meet your filtering criteria: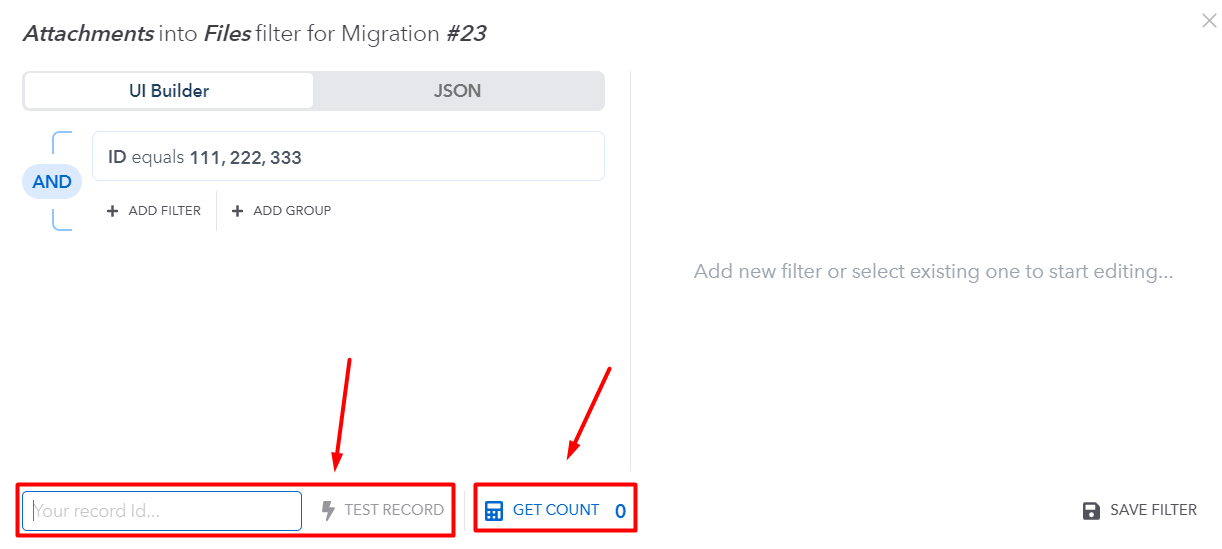
When you are done with filters, click on the Save Filter button to save the changes made: 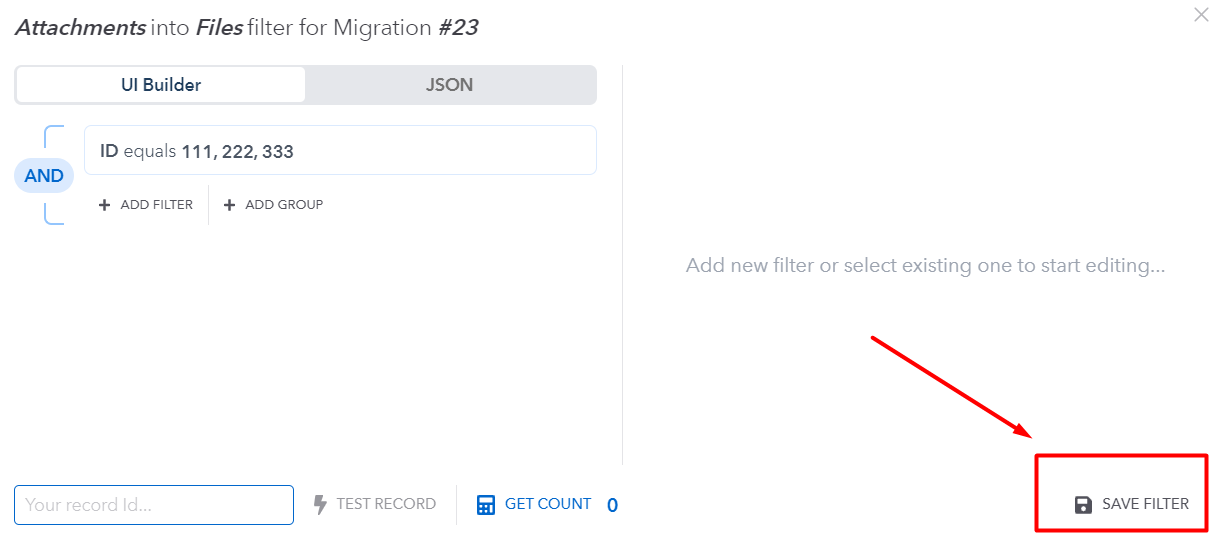
The objects with active filters will have a blue "filter" icon: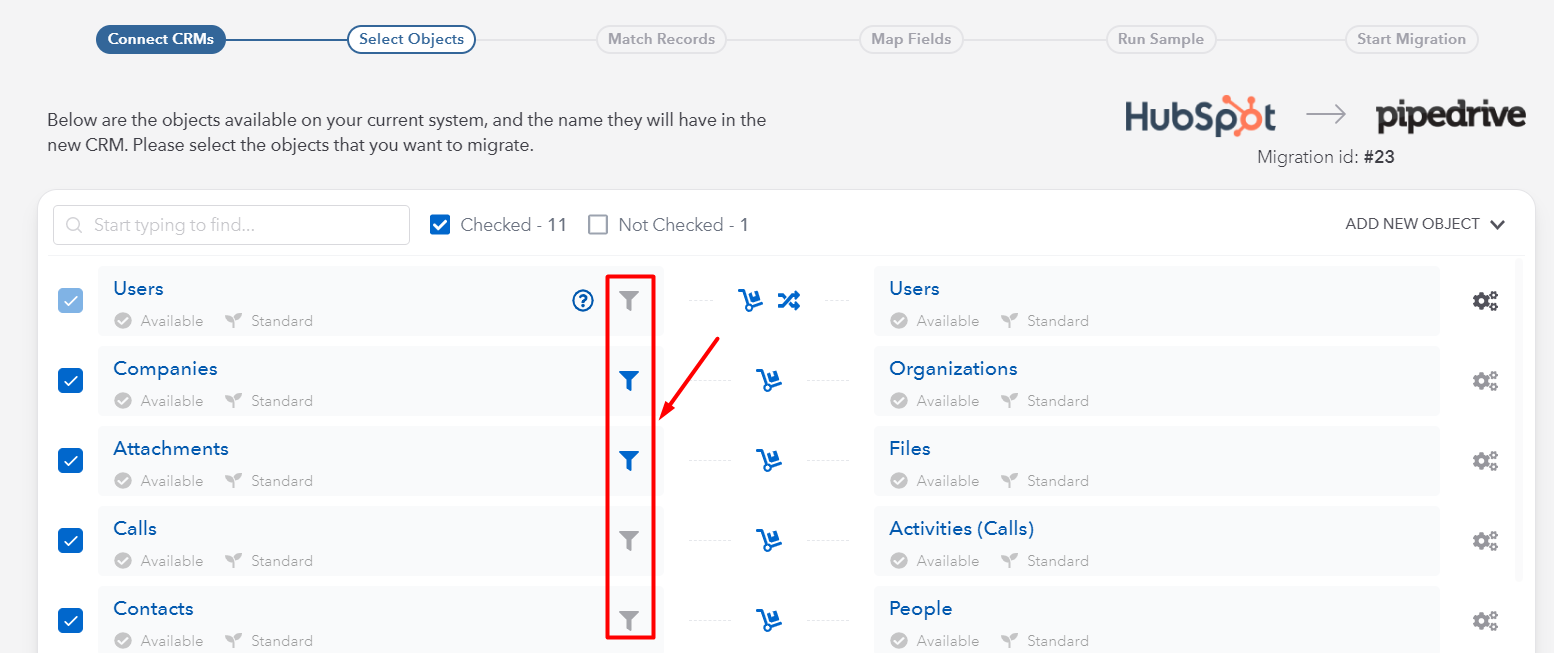
Complex filters use cases
1. If you have one filter available and you would like to add others, you can click on "Add Filter" and select a property from the list: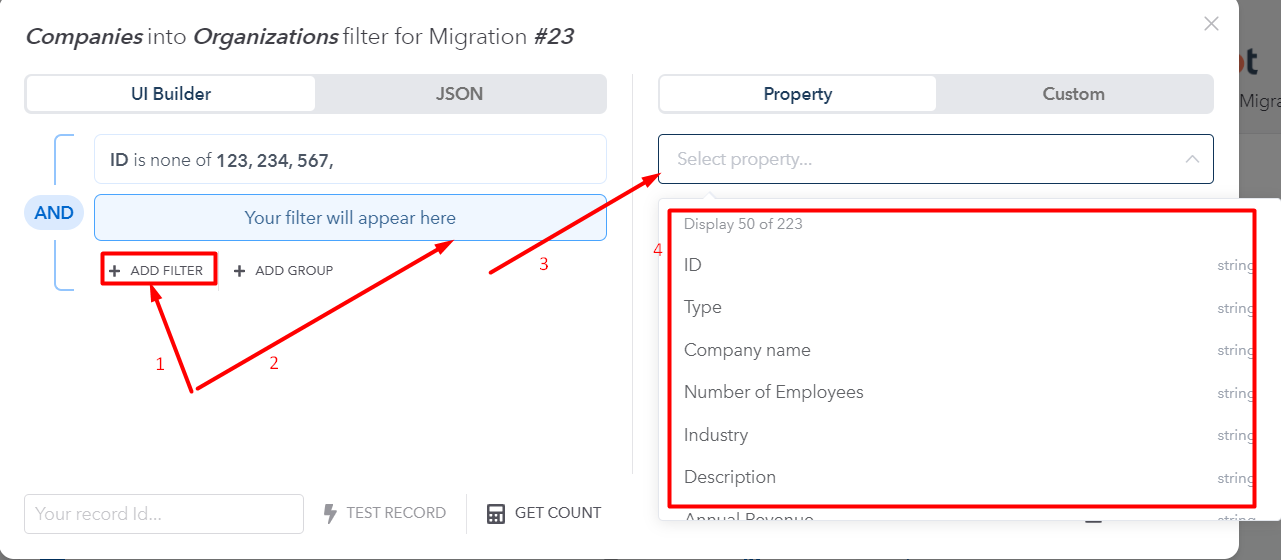
Then you need to select options from the drop-down list (let's say "Is any of"), then for Values - you can select "One" or "Bulk." For "Bulk," please type in the values, starting from a new row for a new value (for example, like below):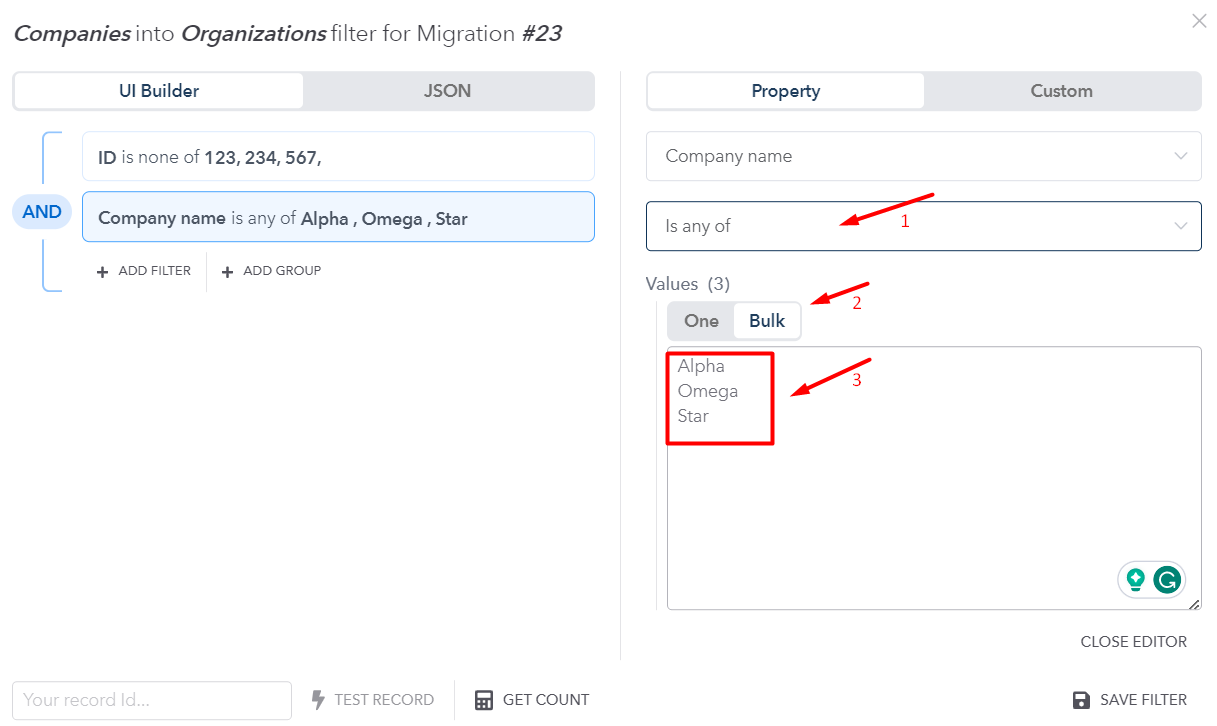
2. You can also select other options for rules(like: And / Or / Nor) by clicking as indicated below: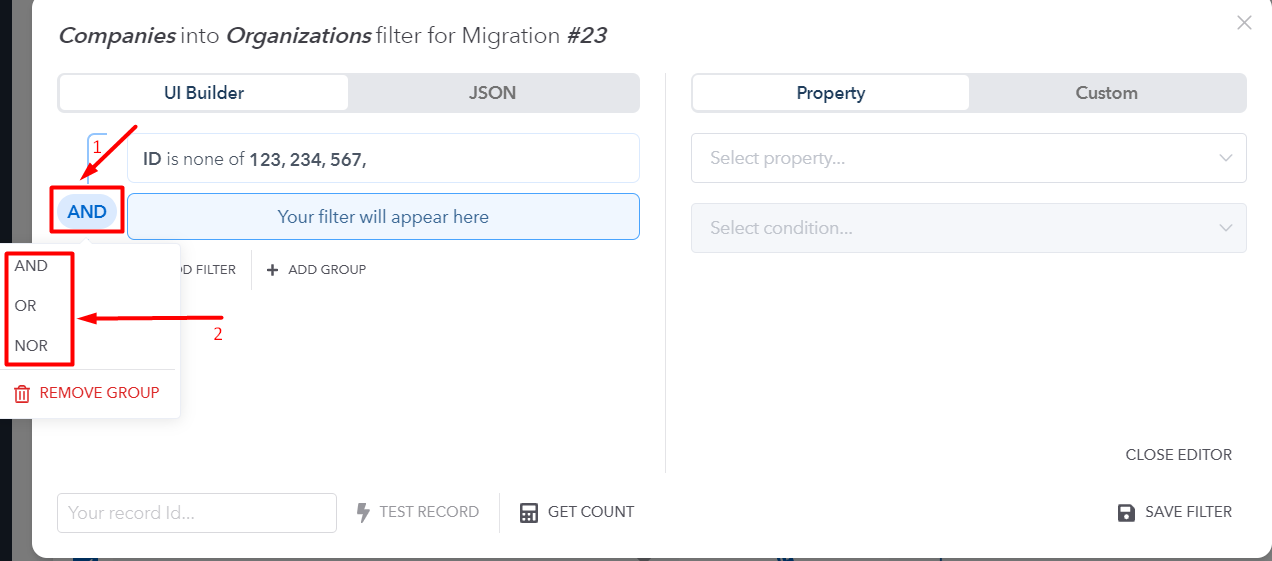
Let's say you set a filter with an "Or" option like this: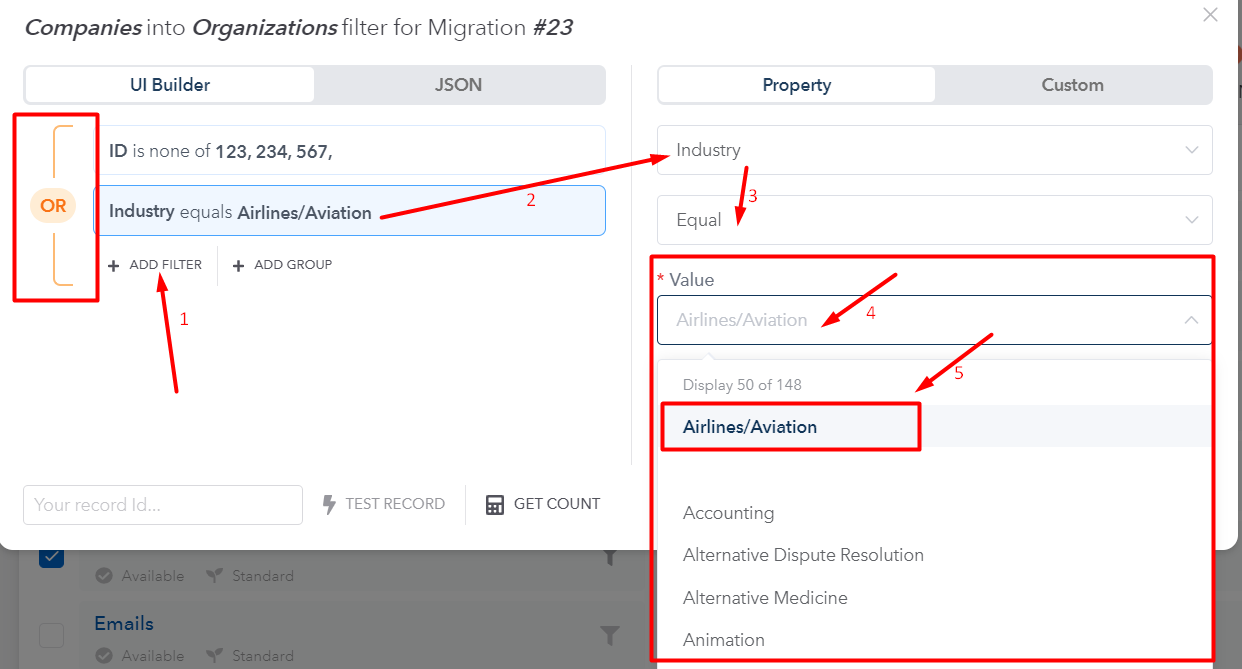
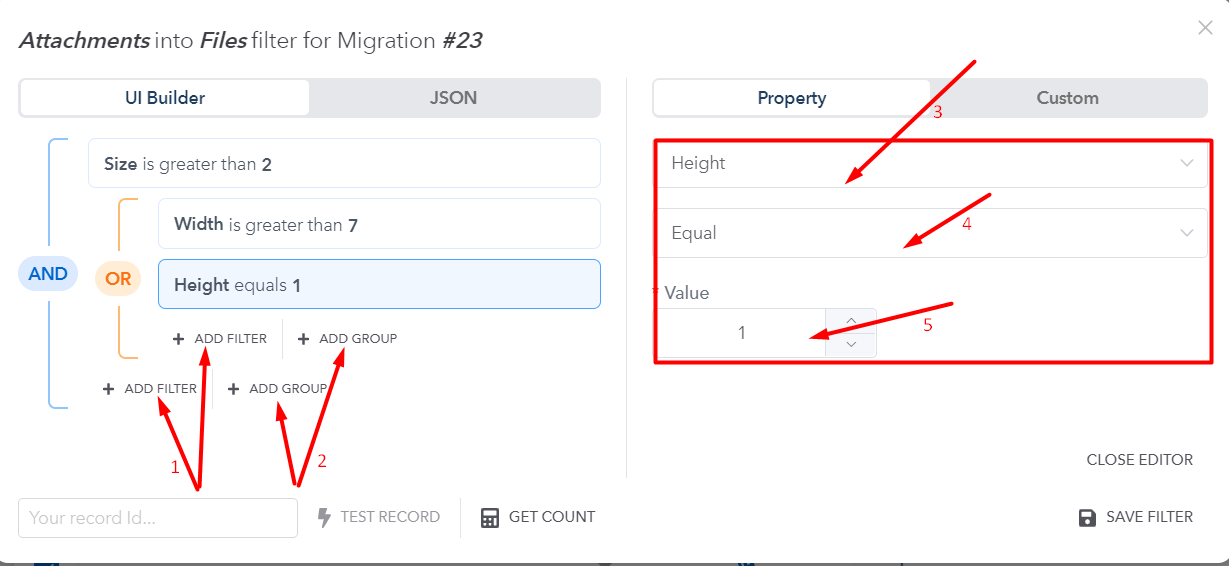
3. You can also add another filter or group inside the current filter or group, like here:
Filters will be applied to all stages of your project: sample, full, and delta migrations.
Still need help?
Please submit an inquiry on the contact page, email support@syncmatters.com, or reach out to us via chat.